
My Grandad’s allotment was a proper allotment, with a shed that smelled of creosote and old tea, a row of canes for the pole beans, and potatoes taking up what felt like half the plot. He’d disappear off there for hours while Grandma and I got on with the flowers at the bottom of her garden.
I’ve tried to grow potatoes myself off and on for years now, in the ground and in old compost bags, and I still get that same small thrill when I tip the container over, and the potatoes come tumbling out. It’s the closest thing gardening gives you to buried treasure.
The growing part is easy, which is why potatoes are every allotment holder’s crop for as long as I can remember. The bit people get in a muddle about is when to lift them out of the ground, and lifting too soon or too late is the difference between a good haul and a disappointing one.

Why Potatoes Are the Perfect Crop for a Casual Gardener
Potatoes forgive a lot. They forgive you forgetting about them for a fortnight in July, they forgive slightly rubbish soil, they forgive being grown in a bag on a patio, and they reward you with actual food you can eat for dinner.
You also don’t need much space. I’ve had a decent haul from three seed potatoes in a big pot, and if you’ve got a corner of a bed you can spare, you can grow enough to keep you in new potatoes for weeks.
They break up heavy soil while they’re at it, which is handy if you’re working with a plot that’s a bit claggy. Grandad used to say potatoes were the crop you put in first to make the ground behave, and I’ve come to think he was right.
The other thing I love about them is the range. First earlies, second earlies, maincrop, salad potatoes, floury bakers, waxy little things for boiling. You pick what you want to eat and plant it.
Chitting, Planting, and the Bit Where You Basically Ignore Them
Start with seed potatoes from a garden center, not the sprouty ones at the back of your pantry. Supermarket potatoes can carry disease, and they’ve often been treated to stop them sprouting, so they’re a bit of a gamble.
Seed potatoes are cheap and come labeled, which is helpful when you’re trying to work out harvest timing later.
Chitting is the fancy word for standing your seed potatoes in an egg box on a cool, bright windowsill for a few weeks until they sprout little stubby shoots. You want the shoots short and fat, maybe half an inch, not long pale straggly things.
First earlies get chitted around late winter, maincrops a bit later. If you forget to chit, the potatoes will still grow; they’ll just be a couple of weeks behind.
Planting is straightforward. Dig a trench about 4 inches deep, pop the potatoes in with the shoots pointing up, roughly a foot apart, cover them over, and walk away. If you’re using a container, half-fill it with compost, put two or three seed potatoes on top, cover with a few more inches of compost, and top it up as the leaves grow.
That topping-up is called earthing up, and it’s the one job you actually need to do. Every time the green shoots get 6 inches or so above the soil, mound more soil or compost over them, leaving just the tips showing.
You do this a few times through spring and early summer. It prevents developing potatoes from turning green in the light, and green potatoes are the one thing you don’t want to eat.
Watering, Feeding, and What Actually Goes Wrong
Potatoes need water, especially once they start flowering, which is when they’re putting energy into swelling the underground tubers. If we’re in the middle of a hot dry stretch like the one we’ve had this July, a good soaking twice a week does more good than a daily dribble. Container potatoes dry out fast, so keep an eye on those; they’ll wilt on you in a hot afternoon.
Feeding isn’t essential if your soil’s decent, but a bit of general-purpose vegetable feed once they’re flowering will help the crop along.
The bigger risks are slugs, which will burrow into the potatoes underground and leave you with holes in your harvest, and blight, which turns the leaves brown and blotchy in warm, damp weather and can rot the potatoes underground.
For slugs, honestly, the best defense is growing in containers where you can, and lifting first earlies before the slugs get too interested. For blight, if the leaves start turning brown and mushy, cut all the foliage off at ground level and pull the potatoes up quickly before it spreads.

When to Actually Dig Them Up (This Is the Part Everyone Gets Wrong)
Here’s where people go astray, and I include past-me in that. The instinct is to wait until the plant looks completely dead and then go digging, or to peek too early because you can’t stand the suspense. Both approaches lose you potatoes.
The trick is knowing which type you planted and watching what the plant does above ground, because the plant will tell you.
For first earlies, dig them once the plants have flowered, usually about 10 to 12 weeks after planting. The potatoes will be small and thin-skinned, the ones you want to boil whole in butter.
Don’t wait for the foliage to die back with first earlies; that isn’t how they work. Just gently scrape around the base of one plant with your hand and see what’s under there. If you’re finding potatoes the size of a hen’s egg or bigger, they’re ready. If they’re still marble-sized, give them another week and check again.
Second earlies come out roughly 13 to 15 weeks after planting, and they’re a bit bigger and firmer. Same trick: have a scrape, see what you’ve got, decide. Main crops are the ones where you actually wait for the foliage to yellow and die back, which usually happens around 18 to 20 weeks after planting.
Once the leaves have collapsed and turned brown, leave the potatoes in the ground for another two weeks to let the skins set, which helps them keep well in storage. Give a potato a rub with your thumb when you lift one to check: if the skin comes off easily, it needs another week; if it stays put, it’s ready.
When you actually go to dig, start well away from the main stem, not right next to it. The potatoes spread out further from the plant than the top growth suggests, and if you go in close and vertical you’ll skewer the biggest ones every time.
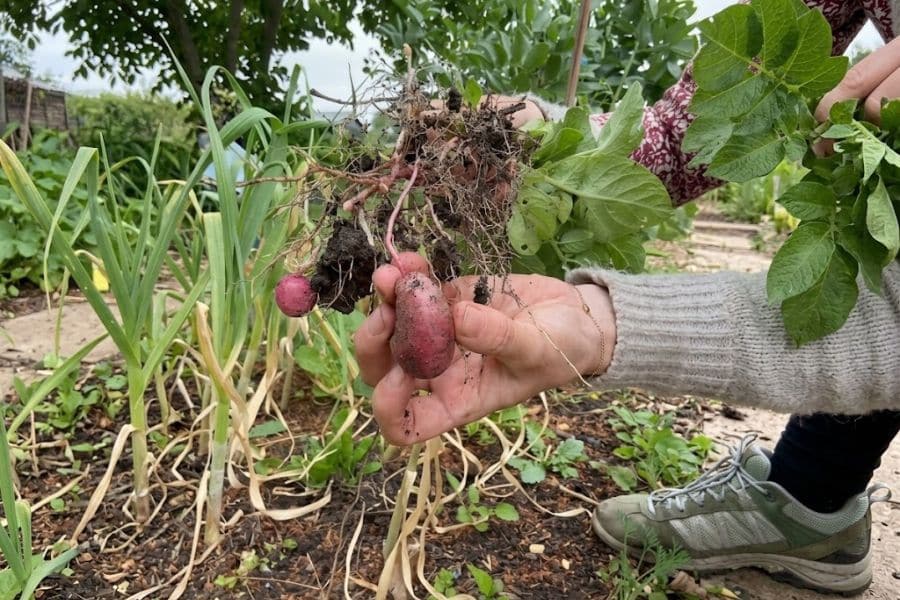
Use a fork rather than a spade, come in from the side at an angle, and lift the whole plant up and out. Then have a good rummage through the soil with your hands, because there’ll be more in there than you first see. Grandad used to make me do the rummaging, and I still think it’s the best bit.
Storing Your Haul So It Actually Lasts
First earlies don’t store. Eat them within a week or so of digging, because that thin skin and high water content means they go soft quickly. Which is fine, because they’re the best-tasting potatoes of the whole year and you’ll want to eat them anyway. They’re so good boiled with mint, and tossed with butter.
Maincrops are the ones you can store properly. Once they’re out of the ground, let them dry on the soil surface for a few hours on a dry day, brush off the loose dirt, and check every potato for damage.
Any with fork holes, slug damage, or soft patches go into the eat-this-week pile. The undamaged ones go into paper sacks or hessian bags, never plastic, and get stored somewhere cool, dark, and dry.
A garage, a shed, a pantry, anywhere that stays cool and doesn’t get light. Light turns them green, warmth makes them sprout, damp makes them rot, so cool, dark, dry is the whole rule.
Check the bag every couple of weeks and pull out any that have gone soft, because one bad potato really does spoil the bunch. Stored well, main crops will happily keep from a late-summer lift right through to the following spring, which is why every allotment holder from Grandad’s generation grew them in bulk.
There’s something rather wonderful about pulling a potato out of a sack in February that you grew yourself in April, and I think that’s the moment when growing your own actually pays you back.
Disclaimer: This article is for general information only and is not professional advice. It may contain affiliate links. Please see our full Editorial Policy for details.

Kylie Lang is a nationally syndicated travel journalist with bylines on the Associated Press Wire & more, a lifestyle writer, and the founder and editor of Your Lifestyle Library (yourlifestylelibrary.com). She holds a BA (Honours) in History from the University of Kent and is a member of the British Guild of Travel Writers.