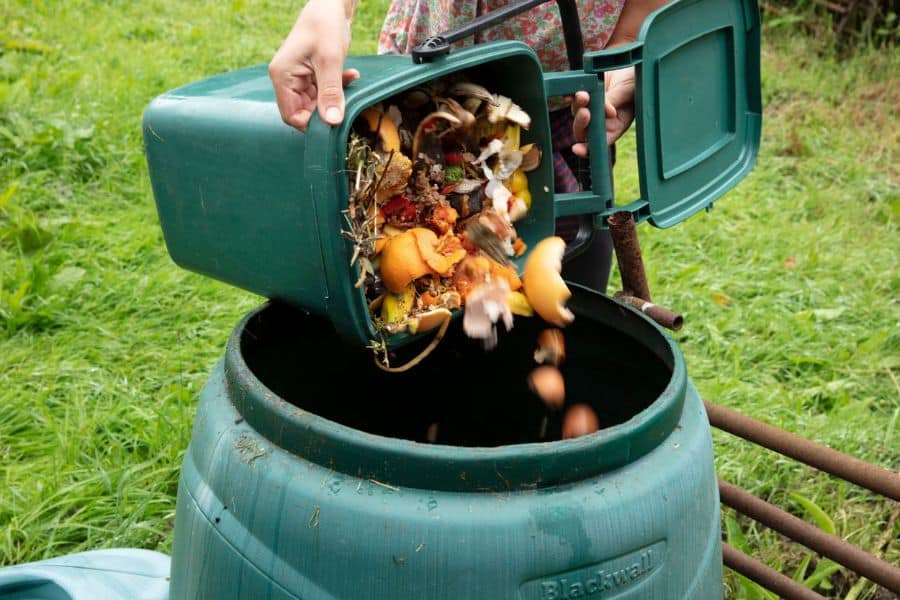
So yesterday I went out to empty my little kitchen scraps bin into the composter, and I got the shock of my life. As soon as I lifted the lid, a cloud of tiny insects came flying straight up into my face. I’m fairly sure I swallowed a few of them.
I’ve been doing the standard cold composting thing since we moved here. You know the drill. Chuck your veg peelings and grass clippings in a heap, leave it for a year, and hope something useful comes out the other end. And it mostly does. But it’s slow, and apparently it’s also a buffet for every flying insect within a 10-mile radius.
So I started looking into the two methods that have been popping up everywhere. Hot composting and worm bins. Both promise faster results, far less smell, and no surprise mouthfuls of bugs. Sign me up.
Why Standard Composting Sometimes Lets You Down
Before we get into the good stuff, let’s talk about why traditional composting can be a bit of a rubbish idea.
It’s slow. We’re talking six to twelve months to get usable compost, sometimes longer if you’ve got cold winters or the wrong ratio of greens to browns.
It can smell. Not always, but when it goes wrong, it really goes wrong. Anaerobic compost (the soggy, oxygen-starved kind) smells like rotting eggs and old bin juice. Not pleasant.
It attracts wildlife you didn’t invite. Fruit flies, gnats, and sometimes rodents, if you’re adding the wrong stuff. And as I discovered yesterday, swarms of tiny insects waiting to ambush.
It often doesn’t get hot enough to kill weed seeds, so you end up spreading those right back into your beds. Not ideal.
Hot Composting vs Worm Bins: What’s the Difference?
These two methods both speed things up compared to a traditional compost heap, but they work in completely different ways.
What is Hot Composting?

Hot composting is essentially turbocharged outdoor composting. You’re still using the same basic stuff (kitchen scraps, garden waste, dried leaves, cardboard), but you build a much bigger pile all at once.
It works by getting your pile to between 130 and 140 degrees Fahrenheit. At that temperature, the bacteria responsible for breaking everything down are working at full pelt, and they’re doing it about 30 times faster than cold-composting bacteria.
The bonus is that heat that high kills weed seeds, plant diseases, and pathogens. So whatever you put in comes out clean and ready for your garden.
The trade-off is that it takes a bit more effort. You can’t just chuck stuff in whenever you have it. You need to build the pile properly and turn it regularly.
How to Start a Hot Compost Pile

Pick a sunny spot. Heat helps heat. Shade slows everything down.
Build it big. A hot compost pile needs to be at least 4 feet by 4 feet by 4 feet. Anything smaller and you can’t trap enough heat in the middle.
Gather all your materials first. Unlike traditional composting, where you add stuff bit by bit, hot composting works best when you build the whole pile in one go.
Get the greens-to-browns ratio right. You’re looking for roughly one part greens (kitchen scraps, grass clippings, fresh weeds, manure from chickens or rabbits) to two or three parts browns (dried leaves, shredded cardboard, straw, shredded newspaper) by volume. Too many greens and it gets slimy. Too many browns and nothing happens.
Chop everything up small. The smaller the pieces, the faster the bacteria can break them down. I run my prunings through a shredder before they go in. Makes a massive difference.
Mix rather than layer. Hot composting actually works better when you blend the greens and browns together rather than doing the lasagna thing.
Water as you build. Each layer wants to be damp, not soggy. Think wrung-out sponge.
Turn every three to seven days. This is the bit that puts most people off, but you only have to do it for about three weeks. After that, the heavy lifting is done.
A compost thermometer is useful here. They’re cheap, and they take the guesswork out. If your pile drops below 100°F, it’s time to turn it.

What to Put In (And What to Leave Out)
Yes:
- Fruit and veg scraps
- Coffee grounds and filters
- Tea bags (the paper kind, not the plastic ones)
- Eggshells, crushed
- Grass clippings
- Dried leaves
- Shredded cardboard and paper
- Manure from herbivores like chickens, rabbits, horses, and cows
No:
- Meat, fish, and bones
- Dairy
- Oils and fats
- Cat or dog waste
- Diseased plants
- Anything with pesticide residue
The meat and dairy rule is the one that brings the rats and the smell.
Now Let’s Talk About Worm Bins

If hot composting sounds like too much faff, or you live in an apartment without garden space, a worm bin is the answer. It’s small, it can live indoors, and properly managed, it really doesn’t smell at all.
I know, I know. The idea of keeping a box of worms in your kitchen sounds a bit grim. But hear me out.
The worms you’re using are red wigglers (not the big garden worms you find outside, those are different and won’t work). Red wigglers live happily in a shallow bin, they eat about half their body weight in food scraps every day, and they produce something called worm castings that gardeners refer to as black gold. It’s that good.
A pound of worms can chew through roughly half a pound of kitchen scraps a day. They reproduce on their own, so over time, you end up with more workers without doing anything.
How to Set Up a Worm Bin

Get the right bin. A shallow plastic storage container works perfectly. Something around fifteen inches deep, twenty inches wide. The worms live in the top six inches of bedding, so deep bins are wasted on them.
Drill some holes. Quarter-inch holes around the top sides for air, and a few in the bottom for drainage. Cover the drainage holes with mesh or screen to keep the worms from escaping.
Set it on a tray. The liquid that drains out (called worm tea or leachate) is rich in nutrients. Dilute it 10 parts water to 1 part tea and use it on your houseplants. They’ll love you forever.
Add bedding. Shredded newspaper, cardboard, or paper bags. Soak it in water, then wring it out so it’s damp like a squeezed sponge. Fill the bin about half full.
Add your worms. You can buy red wigglers online or from worm farms. Start with about a pound for a small household bin.
Bury food scraps under the bedding. This is the secret to a smell-free worm bin. Always cover the food with bedding. Always. Exposed food is what brings the fruit flies and the smell. Hidden food gets eaten quietly and politely without any drama.
Feed two or three times a week. Start small and build up as you see how fast they’re working through it. If food is sitting there untouched after a few days, you’re overfeeding.
Keep them at the right temperature. Red wigglers are happiest between 55 and 75°F. Garage, basement, laundry room, under the kitchen sink. Anywhere that doesn’t freeze or get baking hot.
This 3-layer 50L worm bin is a great one to start off with and saves the hassle of getting it wrong and having worms everywhere.

What to Feed Worms (And What to Avoid)
Yes:
- Vegetable peelings
- Fruit scraps (go easy on citrus)
- Coffee grounds
- Tea bags
- Crushed eggshells
- Shredded paper and cardboard
No:
- Meat or fish
- Dairy
- Oily or buttery foods
- Onions and garlic (worms hate them)
- Citrus in large amounts (too acidic)
- Spicy food
- Pet waste
And absolutely no onions. Apparently, worms find them as offensive as I find Brussels sprouts.
Harvesting Your Worm Castings
Every three to six months, you’ll have a bin full of dark, crumbly, soil-like compost. To harvest it, push everything to one side of the bin and add fresh bedding and food to the empty side. Over a week or two, the worms will migrate over to the new food, and you can scoop out the finished castings from the empty side.
Sprinkle the castings around your plants, mix them into potting soil, or top-dress your veg beds. They’re a slow-release fertilizer, full of beneficial microbes, and they won’t burn your plants the way some manures and chemical fertilizers can.
How to Pick Between the Two
If you’ve got garden space, a steady supply of materials, and you want big volumes of compost for your beds, hot composting wins.
If you live in a flat or smaller space, you produce mostly kitchen scraps, and you want something that runs all year without you having to think about it too much, get a worm bin.
I’m setting up both, because I‘m curious and want to see how the worm one works. The hot pile will deal with the garden waste, and the worm bin will sit happily in the laundry room, handling the kitchen scraps. No more insect ambushes.
Are you thinking of switching things up this year? I’d love to know which method you’d try first.
Disclaimer: This article is for informational purposes only. Always research local regulations and best practices for composting in your area before getting started.